Hooded Towel / Poncho Tutorial

Hello there and thanks for being here. I have had this tutorial ready to go for awhile now, but I had to wait for these two stinkers to come to town so that I could take a photo or two… or ten.

Ace and Evie are starting swimming lessons. I thought this would be a perfect solution to help them remember their towel, to stay warm and dry in the car and their mom won’t have to carry everything.

They are so easy to make! The kids thought they were pretty cool in their “Capes”.

I was going to step it up a notch and add pom poms, but I was afraid with regular washing they wouldn’t hold up, but you could totally add decorative ribbon or or use towels with decorative edging.

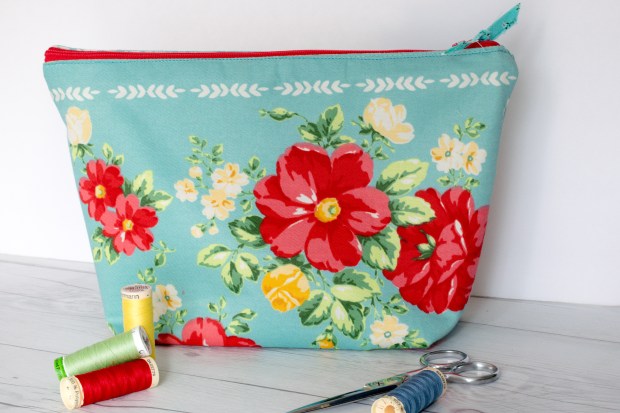
Would you believe these are super easy and beginner sewing friendy to make? They only take a few items to make and you probably already have everything you need at home.

Watch my step by step tutorial below. If you make them, I would love it if you would join my Facebook Groups and Post a photo and/or tag me on Instagram when you post a pic.

Craft Crazy Facebook Group * Sewing Patterns and Tutorials with Lorrie NuneMAKER Facebook Group. * Instagram

Now, here’s that step by step tutorial for you:

ID / Badge Holder – FREE Pattern and Tutorial – Beginner Friendly

ID TAG-8

I finally got to see my son and daughter-in-law this past weekend.  It had been months and I was certainly happy to see their sweet, smiling faces!  Maggie, asked me if I could create an ID tag for her to put her work ID in and attach to her key chain.  Of course, I obliged and quickly went to work on a very simple pattern.ID TAG-4

She requested a verticle tag since it was going to be hanging from her key chain.  I whipped up a super simple tag on my embroidery machine, but I was afraid she’d lose her ID and anything else she put in it.  I decided to create a new pattern with a bit more protection.

ID TAG-2

This is what I came up with and I am thrilled with it.  It is still super simple and takes very little product, but it’s ultimately safer and, lets face it, prettier.  I love that it can be made either vertically and horizontally, depending on your needs.  I also like the lobster clasp attachment which can easily be attached to a lanyard, backpack or keychain.

If you have a Cricut or other digital die cutting machine that can cut fabric with an SVG, this project is going to be super simple for you, because I made an SVG.  You can get it by clicking HERE.  No Cricut, no worries, you can grab the printable PDF pattern by clicking HERE.  Be sure when printing that you print at actual size and not scaled.  There is a guide at the top of each page to measure and make sure you printed it correctly.  When downloading the ZIP file for your digital die cutting machine, be sure and double click the ZIP file to open it and then upload the file ending in .SVG.

Enough of the small talk, let’s start making ID tags!  Be sure and tag me on social media if you make them.  Join my Facebook Groups and post photos!  I love it see them!

Here is the step by step video tutorial:


Bowl Koozie with Free PDF Pattern

Bowl Koozie with PDF

I am revisiting an older project.  The bowl koozie.

The original video I made with this fun pattern was focused around the Cricut.  You can see it here.

Screen Shot 2020-05-05 at 2.13.43 PM

Cricut added my original design to Cricut Design Space.  If you have a Cricut you can easily cut out the shapes.  The Design Space File is available by clicking here.

This time I wanted to make the Bowl Koozie easy for those who don’t have a Cricut.  I have created a FREE PDF Bowl Koozie Pattern so that anyone can make this fun, beginner friendly sewing gift.

If you are new to my channel, or new to sewing, this project is the perfect for you!  Even seasoned sewists, love making koozies.  I’ve got a step by step tutorial for you to make it super easy to get started.

The bowl koozies make wonderful gifts, craft fair items and they are just great to have around for everyday household use.

If you’d like to start creating and follow along with me in a video tutorial, click below.  I’d love to see your Koozies.  Don’t forget to join my Facebook Group and post your photos!

Facebook Groups:

Craft Crazy with lorrie nuneMAKER

  Sewing Patterns and Tutorials with lorrie nuneMAKER

Here is the step by step tutorial:


How to make a face mask

masks

Hello there.  Doug asked me to make a couple of face mask to have on hand in the event that we need them.  I posted them in my Facebook Groups and immediately had a ton of requests to make a tutorial.  I am posting the tutorial of these masks with the disclaimer, I followed THIS PDF tutorial which was recommended by a hospital.  I do not know the exact effectiveness of the face mask, but I do know, it provides an added layer of protection.

I have also provide a Cricut Design Space file for those of you who have a Cricut Maker.

You can find the Cricut Design Space ADULT Size File by Clicking HERE. You can find the Cricut Design Space CHILD by Clicking Here.

For those who do not have a die cutting machine, you don’t need one.  This is two simple rectangles that can easily be cut by hand.

Please do your research. This is not a protection from the Corona VIrus. This is simply an added barrier between you and the outside world. Visit the CDC website for the best way to protect yourself from the Virus.


Here is the Tutorial:


How to Make Envelope Pillow Covers

southbendpillowThis has got to me the EASIEST sewing project, ever!  Not only is it very beginner friendly, but it’s so practical.  With this tutorial you can virtually create unlimited amounts of personalized pillows and personalized gifts.  My friend, Karen Runge, showed me a similarly designed pillow and encouraged me to make a tutorial.  I used the Cricut EasyPress and Iron on to create my design.  You could also use this tutorial to  create a blank for Infusible Ink, Embroidery, fabric pens and fabric markers.  So many possiblities.

Let’s get right to the tutorial.  You are going to want to make pillows for all of your friends and family.  (Psssst.. these would make perfect holiday gifts!)

The Ashley Tote Bag

Ashley-Tote-YT

Hi there!  Over in my Craft Crazy with Lorrie nuneMAKER Facebook Group I posted a bag similar to this quite awhile ago.  It was this bag:

IMG_5139 2

and boy did I have a lot of request to make a tutorial.  Life got in the way… my son got married.  I have been so busy with wedding planning, guests every weekend, that I just didn’t have time to create a tutorial.

I did, however, take the time one afternoon to make a mock up so that I could get the dimensions down.  I came up with this tote:

IMG_5147 2.jpeg

Today, I finally had a chance to take a little bit from each bag and change it up just a little more and create the “Ashley” tote.  I love it so much.

Ashley Tote-4

The fabric makes me happy and the quilting just gives me all the feels.

Ashley Tote-6

Green and white polka dot?  I mean, c’mon!

Ashley Tote-5

Of course, I have a step by step tutorial for you.  You can find it below.  I have written down all of the dimensions for you.  You can get them in my shop HERE.

Here’s the video tutorial:   

Pocket Placemat

joann placemat-9-2

Well hello there!  I am happy you are here!  Over in my Craft Crazy Facebook Group. I had a group member ask if I would create a tutorial on this super cute pocket placemat!  She found this wonderful tutorial over on the Joann Fabric website and wanted to see a video tutorial.

joann placemat-1-2

I mean what is not to love about this cutie?  It’s so fun and I can think of a ton of ways to change it up, like this one:

69553325_10157469364091870_7904213054257102848_n-2

A quick change of fabrics and embellishments and you’ve got a Halloween Placemat.

Joann Fabrics did an amazing job of writing out the tutorial, but if you’d like to see a video, step by step tutorial click below:

Placemat Pouch Version 10! – The Tote

This is going to be a really quick post.  I started the Placemat Pouch Series over a year ago and the response has been overwhelming.  There are now 10 different placemat projects.

Today, I launched the newest member – Version 10 – The Tote.

Placemat 10

I am really happy with how this one turned out and I think the faux leather opens up a bunch of possiblities with the Placemat projects.  I’ve already got a few others lined up.

You can find the Step By Step Tutorial Here:

If you’d like to check out the other 9 placemat projects, CLICK HERE FOR A FULL PLAYLIST ON MY YOUTUBE CHANNEL

IMG_0437

Placemat V4-8

Placemat-3

Fabric labels-5-2Pioneer WOman Pouches-2Tool-Caddy

PW Cosmetic (1 of 1).jpg

How to Make A Luggage Tag

Luggage tag-2

May is full of travel plans for me.  I’ve been working on this vinyl project series, so let’s make vinyl/faux leather luggage tags!  How cute are these?!!?

Luggage tag-4

I have found so many fun materials to use, like this Cricut Faux Leather, or this

Luggage tag-5

yummy pink glitter faux leather.  I mean does it really even get any better than pink glitter?

Luggage tag-6

This one was made with my friend, Teri, in my mind.  Leopard is her family tartan.  She swears it’s true! 😉 . I found this print in the ribbon section at Hobby Lobby.

Luggage tag-7

This one is probaby my favorite! It’s so stinking cute!  It’s more shiny and bright than the others.

Luggage tag-9

Did I mention you can totally use Cricut Iron On with the Cricut EasyPress to personalize?  Maggie is going to love this one!

Want to know the best news?  I’ve got a downloadable PDF pattern for you.  If you have a Cricut, I’ve even got the cut file for you.

PDF PATTERN (CLICK HERE)                               CRICUT DESIGN SPACE FILE (CLICK HERE)

iI you create one or two or five, please be sure and tag me on social media!  I would LOVE to see them!

This is probably one of the fastest, easiest tutorials I have made.  You can watch it all in the step by step video tutorial here:


*Disclaimer:  Links above are affiliate links.  By clicking on these links I may earn a small commission at no cost to you.  Some products may have been provided to me by vendors, however, all opinions and reviews are strictly my own.  This is not a sponsored post.

Canvas & Faux Leather Tote Bag

canvas leather tote bag-1

Many of you have messaged me and asked for projects that utilize faux leather.  Today, I give you the leather/canvas drop cloth tote bag.

canvas leather tote bag-5

Yes, we are using more of that canvas drop cloth that we used in Pillow Covers, the Shabby Fabric  Basket , and the Canvas Zipper Pouch.  We are getting a lot of mileage out of a simple paint drop cloth.

Tissue Pouch-2

I made both versions of this bag with Cricut Designer Fabric.  They have an amazing bundle right now that will really add to your fabric stash.  Both of the totes above were made from the fabric bundle.  They are currently phasing out fabric, so once this bundle is gone, it’s gone for good.  It’s a $129.90 value, on sale for only $39.99.  Psst… if you’re a Cricut Access Member you’ll save 10% off that price and use my code MAKERS10 and you will save ANOTHER 10%.  That is a whole lot of fabric at a very affordable price.

Tissue Pouch-3

This black and metallic rose gold is really striking in person.  Even if you don’t use a Cricut, this fabric is a great deal.  I didn’t use the Cricut for this project, but I still used the fabric.

Are you ready to make your own canvas and leather tote bag?  I’ve got you covered with a video that includes step by step instructions!