Baby Bib with your Cricut!

Bib set-1

What is it about everything baby that is just…instantly cute!  I had a big response to the baby bib gift set I posted earlier, so I decided to create a tutorial.

Bib set-3

This project is PERFECT for a beginner sewist.  The bib can easily be made with 2 fat quarters (for a reversible look), or just one if you don’t mind both sides matching.  I prefer to use a flannel or terry cloth fabric for the back just to give it that soft feel and add some extra absorbency.  I used a Cricut Quilting Kit for the fabric.  I just love how all of their Riley Blake patterned fabrics go so well together.

Bib set-4

If you haven’t upgraded to the Cricut Maker yet yet, don’t worry.  You can make this with the Cricut Explore (or even a Silhouette).  Simply follow along and cut the pattern pieces in cardstock, then use the cardstock as a pattern piece to cut your fabric by hand.  Easy Peasy!  Of course, I love using the Cricut Maker to cut all of my fabric pieces.

I’ve provided you with the free SVG file to use for your pattern.  You can download it here.  Be sure and turn off the word layers when you cut the file.

The bib is already sized for you, simply upload it into Cricut Design Space (or Silhouette Studio) and you’re ready to go.

Here’s a picture of another gift set I made using this pattern.

bibset

All of the products used in the tutorial are linked below:

Save 10% and get free shipping on Cricut Accessories with code LORRIE.  Access Discounts also apply.

Cricut Fabric:  http://shrsl.com/vu2t

Cricut 12 x 24 Acrylic Ruler:  http://shrsl.com/whdp

Cricut Rotary Cutter:  http://shrsl.com/wi9o

Cricut Self Healing Mat:  http://shrsl.com/wka6

Cricut Rotary Cutter/Mat/Ruler Kit:   http://shrsl.com/vx88

Cricut Fabric Mat:  http://shrsl.com/w7c8

Cricut Maker:  http://shrsl.com/jljo

Cricut Explore Air:  http://shrsl.com/ka3p

Wonder Clips:  http://amzn.to/2BS8eB9

Singer Sewing Machine:  http://amzn.to/2IxpErn

Snap fastener kit:  https://amzn.to/2IOMomX

Flannel:  https://amzn.to/2JcUeWJ

Disclaimer:  Links above are affiliate links.  By clicking on these links I may make a small commision at no cost to you.  Some products may have been provided to me by vendors, however, all opinions and reviews are strictly my own.

Burp Cloth with the Cricut Easy Press, Maker & Thermoweb HeatnBond

Burp EP-1

Burp!  That’s not something you usually see a blog post start with!  Of course, we are talking baby burp cloths.  This burp cloth started with a towel from the Target Dollar Spot!  I couldn’t resist the cheery orange and pink stripes.  Of course, I had to add a cute ruffler (you can watch my tutorial here to find out how).

Burp EP-5

Now,  you know I couldn’t stop with just a ruffle!  I had to get the Cricut Maker & Cricut Easy Press involved!  I mean, hello?!!  This fun, little, ruffled towel was screaming for some pretty letters that said BURP!  It was so easy with the help of HeatnBond Lite Adhesive.

So… you want to know how I made this little ditty?  Here’s a tutorial for yo


DIY Placemat (for Zipper Pouches)

Hello!  I’m so happy you are here!

I have a really easy project for you.  Due to the overwhelming response I’ve had to the

Placemat-1

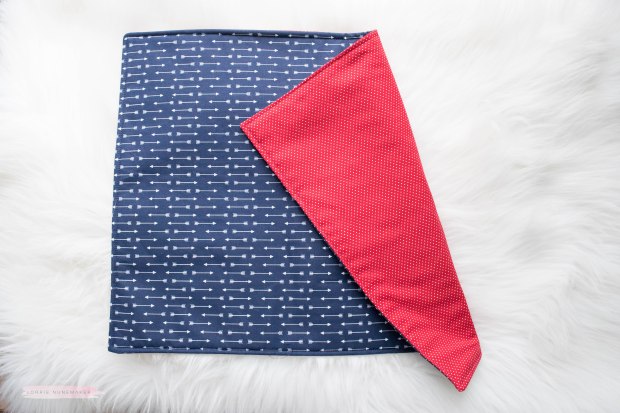
Placemat pouch tutorials, I thought you might enjoy a DIY placemat, so that you can use your own beautiful fabrics.

Placemat-3

This is a really easy, basic placemat.  I will show you how to add your own “cheater binding” so that you can add the pop of color around the zipper (red polka dot in the photo above).

I do recommend one change from the video.  This placemat is not quilted due to the way it is made.  Therefore, I would highly recommend adding Heat N Bond Craft Interfacing to the lining.  In the tutorial I show you how to add the fusible fleece to the outer fabric.  I recommend using both the fusible fleece on the outer and the interfacing on the lining.  This will provide a stiffer, crisper pouch.

Placemat-5

I also linked a video to bind the placemat around all four sides in case you really want to use this as a binded placemat.  You can absolutely leave it with no binding as well.  A lot of different options for a lot of different looks.

Are you ready for the tutorial?

Products used in Video:

Heat n Bond Fusible Fleece: http://shrsl.com/w3d5

OPTIONAL:
HeatnBond Extra Firm Fusible Interfacing: http://shrsl.com/ukgy
Heatnbond Extra Firm Fusible Interfacing (Amazon Link):
https://amzn.to/2pYt66F
Pilot Frixion Fushion Pens: https://amzn.to/2DP2usR
Wonderclips: https://amzn.to/2pDfDQI
3” Quilting Ruler: https://amzn.to/2I1RICc
Singer Quantum Sewing Machine: http://amzn.to/2IxpErn

Disclaimer:  Links above are affiliate links.  By clicking on these links I may make some change at no cost to you.  Some products may have been provided to me by vendors, however, all opinions and reviews are strictly my own.
How to bind a quilt: https://youtu.be/cGOIAnc0_M4

Social Media Info

Facebook: https://www.facebook.com/lanunemaker

My blog: http://www.lorriesstory.com/

Pinterest: https://www.pinterest.com/lanunemaker/

Instagram: https://www.instagram.com/lorrie_nunemaker/
Measurements:
(2) pieces of fabric 15 x 20″ (My fabrics are from Joanns)
(1) piece of fusible fleece 14 x 19″ – Linked above
(1) piece of interfacing 14 x 19 (OPTIONAL) – Linked above


Baby Gifts Galore!

bibset

Have I mentioned how much I LOVE my Cricut Maker?  I do!  It has opened up a whole new world of crafting for me.  I made this cute little gift set in one afternoon.

baby Gift set-4

The Cricut Maker cut all of the fabric pieces for me. I love that each piece is precisely cut so that all I have to do is stitch it together.  I created the bib design in Adobe Illustrator and simply uploaded the pattern to Cricut Design Space.

baby Gift set-7

Even this sweet little bow was created using pattern pieces cut by the Cricut Maker.

baby Gift set-3

I think the real winner of this entire gift set is the adorable fabrics!  I bought the Little Dolly Baby Size Quilt Set from Cricut and used the fabrics to create this adorable baby gift set.  The Burp cloth is made from fabric and a cloth diaper.  It’s so soft and absorbant for baby and for mom.

I can’t wait to use more of the fabrics on future gift sets.

Social Media Info

Facebook:  https://www.facebook.com/lanunemaker

My blog:    http://www.lorriesstory.com/

Pinterest: https://www.pinterest.com/lanunemaker/

Instagram:  https://www.instagram.com/lorrie_nunemaker/

Youtube:  https://www.youtube.com/user/LONU2008

Placemat Pouch Version 3

Hello and welcome!  Today I have ANOTHER placemat project for you.  These placemat projects have had an enormous following and I could not be happier about it.  They are so quick and easy to put together and the hard part (the quilting) is already done for you!

Placemat Bag Part 2-2

Today, we are making this upright version.  This could be perfect for a make up bag, a lunch bag, an “essentials” travel bag or even just a cute tote or pouch for storage.

Placemat Bag Part 2-3

The boxy shape and raised zipper make it extra roomy and easy to get in.

Placemat Bag Part 2-3-2

I lined this one with Thermoweb Iron On Vinyl which gives the inside a wipeable, waterproof lining.  The handle uses Thermoweb Extra Firm Fusible Interfacing to give it extra sturdiness and durability. IMPORTANT NOTE: handle interfacing should be cut to 2″ x 14″, not 4″ x 14″ as stated in video. All of the correct measurements are in the video description.

Placemat Bag Part 2-1-2

I think these are a fun edition to the Placemat Zipper Pouch (Version 1), the placemat wallet, the placemat basket and the placemat square pouch (Pictured below).

Ready for the tutorial (you knew I had one ready for you!):

Fabric Baskets from a Placemat – Easiest Project EVER!

Hello again!  I seem to have a thing for placemats recently.  Today, I am showing you my latest creation and it is Simply THE EASIEST PROJECT EVER!

Placemat basket-17ΩTadaa!!!!  I mean… how cute is that and I literally two of them in less than 10 minutes!  I’m not exaggerating!

Placemat basket-1The best part?  Is this is a perfect project for beginner sewist (like me) and, even those who are masters.  Who doesn’t need an extra Catchall in the kids room, the bathroom or almost anywhere?

Placemat basket-9I have 5 balls of yard, plus some pom poms in this one.

Placemat basket-14I think the pom poms look so cute folded down like this, but you can leave them up and it’s super cute like that as well and gives you even more room.  I made a few others (you can see them in the video).  Endless possiblities.

Placemat basket-3

Oh, did I mention… this was made from a $3.47 Pioneer Woman Placemat at Walmart!  Yep… it’s that easy!

Ready to make one?  Here’s your tutorial!  Have fun and don’t forget to tag me on social media so I can see yours!!