ITH Card Wallet – Single & Multi-Needle Project

A while back my daughter came to town and she had the cutest little card wallet that was just big enough to hold a couple of credit cards and a driver’s license. It was just the perfect size.

As I am sure many of you can relate, with 2 littles, she often doesn’t want to carry a purse on top of all the other “kid stuff” she has to tote around. So, this little card wallet is perfect for her to make a quick trip to the store, or go to a ballgame or even the gym.

It’s big enough to carry a credit card or two, your license and keys. I decided that between my two embroidery machines, my Ricoma Multi-needle and/or my Janome 550E single needle, surely I could create something similar. I did just that! I made not one, but two different versions of this simple little wallet.

Want to know the best part? I am sharing the embroidery files with you! If you have an embroidery machine with a 4 x 4 hoop you can make the version below.

If you have a machine that can stitch 5 x 7 you can make either the eyelet version above or this snap tab version

I think they are equally adorable! Don’t be afraid to mix up the patterns, materials, etc. The vinyl I used can be found HERE (note: it’s not always in stock, so when you see it, grab it!) I think cork makes a really cute card wallet as well. There are endless varieties of vinyl styles. I can’t wait to see what you choose.

I have included step by step instructions in the video tutorial below. I stitched on both my multi-needle and my single needle in the video. Remember, just because I may use a multi-needle in my videos, as long as you have a hoop of similiar size, you can create the same projects on a single needle machine.

If you’re interested in the Ricoma, please use this link to save you up to $100. They are running a special right now with FREE SHIPPING. That is a big deal, as these machines come to your door step in a semi trailor. You will want that FREE SHIPPING! 🙂

ITH Card Wallet by lorrie nuneMAKER

Create these fun card wallets in a 4x4 or 5x7" In The Hoop utilizing your single or multi-needle embroidery machines.  A fast a easy sew!

For a step by step tutorial, please watch my Youtube video here:  https://youtu.be/LOXygv6d5aA

This is a digital download only.  No physical product will be sent.

Note: You may sell finished items made with this file, however, please do not share, sell nor recreate the digital file.

FREE DOWNLOAD

Send download link to:

I confirm that I have read and agree to the Privacy Policy.

Subscribe to get exclusive content and recommendations every month. You can unsubscribe anytime.

So, on to the video instructions:

In The Hoop Valentine Coasters – FREE Embroidery Designs!

Valentines Day is right around the corner. I cannot even believe I just said that! I don’t do a lot of decorating or a lot of Valentine crafting, but I wanted to make a little something to make it feel like Valentines.

These are so quick and so easy to make! I am just learning to digitize with the Chroma Luxe Software. I was excited to be able to create four simple designs with very little effort. I will be sharing more digitizing tutorials soon.

I love how simply changing the fabric from cork to vinyl and changing the thread colors make each set unique. This set of coasters could really be used any time of the year. They are very affordable to make, easy to store and let’s face it, you can just toss them and make a new set if they get overly used.

I have included several formats of embroidery patterns for you to make a set or two of your own. I would love it if you make them and tag me on social media. It’s always fun to see others making something I created and I enjoy seeing how each of you make it your own. You can get the FREE DOWNLOAD here.

As for assembly instructions, I will walk you through the steps on my Ricoma EM1010 Multi-needle machine, but if you have a single needle, don’t worry because the steps are exactly the same. Let’s get started.

Animal Print Key Chains… I mean c’mon :)

I was so happy when Parker on the Porch gave me the OK to make a video featuring her fun animal print key chains. I mean, Leopard is the signature pattern of this crazy 2020 year.

Leopard is everywhere.

They are each made on the embroidery machine. I used my Ricoma EM1010 Multi-Needle Machine (link saves you $100), but you can make them on a single-needle machine as well.

I sent this one to my leopard-loving friend, Teri. She loved leopard before leopard was on every display at the mall.

I kept the Zebra keychain, but I love the tiger print, too! Don’t you think they would make the perfect stocking stuffer?

If you want to learn how to make these adorable In the Hoop Key Chains, click the tutorial below.

*Disclaimer:  Some links above are affiliate links.  By clicking on these links I may earn a small commission at no cost to you.   Some products may have been provided to me by vendors.  All opinions and reviews are strictly my own.

ID / Badge Holder – FREE Pattern and Tutorial – Beginner Friendly

ID TAG-8

I finally got to see my son and daughter-in-law this past weekend.  It had been months and I was certainly happy to see their sweet, smiling faces!  Maggie, asked me if I could create an ID tag for her to put her work ID in and attach to her key chain.  Of course, I obliged and quickly went to work on a very simple pattern.ID TAG-4

She requested a verticle tag since it was going to be hanging from her key chain.  I whipped up a super simple tag on my embroidery machine, but I was afraid she’d lose her ID and anything else she put in it.  I decided to create a new pattern with a bit more protection.

ID TAG-2

This is what I came up with and I am thrilled with it.  It is still super simple and takes very little product, but it’s ultimately safer and, lets face it, prettier.  I love that it can be made either vertically and horizontally, depending on your needs.  I also like the lobster clasp attachment which can easily be attached to a lanyard, backpack or keychain.

If you have a Cricut or other digital die cutting machine that can cut fabric with an SVG, this project is going to be super simple for you, because I made an SVG.  You can get it by clicking HERE.  No Cricut, no worries, you can grab the printable PDF pattern by clicking HERE.  Be sure when printing that you print at actual size and not scaled.  There is a guide at the top of each page to measure and make sure you printed it correctly.  When downloading the ZIP file for your digital die cutting machine, be sure and double click the ZIP file to open it and then upload the file ending in .SVG.

Enough of the small talk, let’s start making ID tags!  Be sure and tag me on social media if you make them.  Join my Facebook Groups and post photos!  I love it see them!

Here is the step by step video tutorial:


Bowl Koozie with Free PDF Pattern

Bowl Koozie with PDF

I am revisiting an older project.  The bowl koozie.

The original video I made with this fun pattern was focused around the Cricut.  You can see it here.

Screen Shot 2020-05-05 at 2.13.43 PM

Cricut added my original design to Cricut Design Space.  If you have a Cricut you can easily cut out the shapes.  The Design Space File is available by clicking here.

This time I wanted to make the Bowl Koozie easy for those who don’t have a Cricut.  I have created a FREE PDF Bowl Koozie Pattern so that anyone can make this fun, beginner friendly sewing gift.

If you are new to my channel, or new to sewing, this project is the perfect for you!  Even seasoned sewists, love making koozies.  I’ve got a step by step tutorial for you to make it super easy to get started.

The bowl koozies make wonderful gifts, craft fair items and they are just great to have around for everyday household use.

If you’d like to start creating and follow along with me in a video tutorial, click below.  I’d love to see your Koozies.  Don’t forget to join my Facebook Group and post your photos!

Facebook Groups:

Craft Crazy with lorrie nuneMAKER

  Sewing Patterns and Tutorials with lorrie nuneMAKER

Here is the step by step tutorial:


How to make a Planner Pouch

DSC_0013

Hey there!  Thanks for stopping by! I had a few requests over in my Craft Crazy Facebook Group to create a tutorial for a planner pouch.  I grabbed my planner and got busy creating what I felt was a perfect size, but you can easily adapt it to fit your planner.

DSC_0001

I think it’s super practical and not just for planners.  Journal writers, students and list makers would also enjoy a pouch.  Keeping all of your planner stickers, writing utensils, clips, erasers, etc. with your notebook has never been easier, or prettier.

DSC_0003

This is a beginner sewing friendly tutorial. Don’t let the zipper scare you, I am going to walk you through it step by step… it’s easier than you think!

I would love it if you would tag me on social media when you make theplanner pouch.  You can find me by clicking here 

If you have a Cricut, I have a Design Space file so you can let the Maker cut the fabric and interfacing for you.  CLICK HERE FOR THE DESIGN SPACE FILE.

Are you ready to get started?  Here’s the tutorial:

How to Make Fabric Rope

DSC_0034

This is another really easy, but fun project.  I love to make fabric twine/rope while watching tv.  I am not a person who can just sit idle, I need my hands to be doing something.

DSC_0047

Last night, while watching a movie, my daughter in law and I made these balls of twine.  They turned out so beautiful.

DSC_0043-2

Today, I took her ball of twine and made it into this cool trivet.  The smaller one is a coaster.

DSC_0045-2

It is truly a one of a kind rope and I kinda love it!  The best part?  It’s made with nothing more than fabric from my scrap bin!  What a wonderful way to recycle your scraps.

DSC_0045

I plan to keep going with my ball of twine and hope to make a rug out of it.  They are fully washable (I know that’s what you were thinking when I said rug!).

So, do you want to learn how to make some scrap busting fabric rope?  I have a step by step tutorial.  I would love it if you make some if you would tag me on my social media channels and Facebook Groups. You can find me by clicking HERE.

Here’s the tutorial:

Brinkley Double Zipper Pouch / Cross Body Bag

IMG_5800Thanks for stopping by!  I am so excited to share with you the Brinkley Double Zipper Pouch / Cross body Bag.  This is a fun and practical bag.  It features two zipper pockets

IMG_5792

as well as a surprise third pocket in the middle.  It’s super roomy.  I can easily fit my iphone XS Max inside the smaller pouch with plenty room to spare for keys, wallet, etc.

IMG_5807

I made two different sizes.  The smaller size is approximately 6 x 8 and the larger is 8×10.

IMG_5821

I love that you can easily switch between a clutch to a cross body bag by simply changing the detachable strap.

The measurements are as follows:

2 Outer Fabrics 8″ x 10″ (small size 6 x 8) .

2 Lining Fabrics 8 x 10 (small size 6 x 8)

2 Fusible Fleece cut to 7.5 x 9.5

1 Fabric for wristlet strap 3″ x 15″ (lengthen or shorten to your preference)

1 Fabric (or vinyl) 2 x 4″ for tab

1 D-ring / 1 Swivel Lobster Clasp

I will be making several of these for Christmas gifts.  Are you ready to make one (or three?).  Get your zippers, some cute fabric and your favorite beverage and let’s get making!!  Here is a step by step tutorial for you:

Triangle Pouch

Triangle Pouch-1Triangle Pouches are super fun to make and they look harder than they really are.  It’s really just a few straight seams and you’re done.
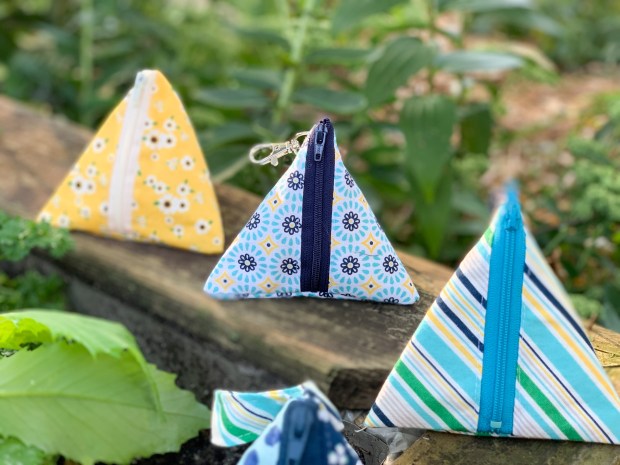
Triangle Pouch-1-2

I looked around at Pinterest and Youtube and couldn’t find any tutorials showing how to fully enclose all the of the seams in the lining.  I really love the simplisity of the patterns I saw on Pinterest, but I didn’t love seeing the raw edged seams on the lining.  I wanted the inside to be as pretty as the outside.

Triangle Pouch-2

So, I created my own tutorial with a completely finished linining.  It’s really not hard at all and only adds 2 extra steps.

Triangle Pouch-3

They turned out great and I can’t wait to give a few to some friends.  They are also the perfect STOCKING STUFFER size!  You could add a chapstick, handsanitzer or something fun and stuff them into the stocking or even hang them from the stocking.  So many ideas.

Are you ready for the tutorial and to find out how I enclosed all of the seams?  Here you go!

Urban Hair Scrunchies – FREE PATTERN

IMG_4022

Hey there!  Just a quick post to let you know I just released a NEW Video Tutorial for these fun Urban Scrunchies.  I am so happy with how they turned out.  They are a quick and easy project and a great scrap buster!  Watch the video for step by step instructions.

If you’re looking for a shorter tails version try the Urban Scrunchie Mini!

If you have a Cricut you can use my FREE SVG PATTERN to cut them out with your Cricut Maker.  If you prefer to cut by hand, I’ve got a PDF for you as well!  These are Drop Box downloads.  You don’t need to download Drop Box.  Simply click on the link and then click the 3 dots in the upper right corner and click download.

NOW AVAILABLE:  Pick up an Acrylic or Wooden Template here.  If you’re planning to create tons of Urban Scrunchies for your Etsy Shop, Friends and/or Family, this will cut your time in half!   Watch how fast it is to cut your Urban Scrunchie pattern:

If you make them, I would love it if you would tag me on social media and please come join my Craft Crazy Facebook Group where thousands of others are sharing photos of projects they have created with my Tutorials

Social Media Info

Facebook:  https://www.facebook.com/lorrienunemaker/

Pinterest: https://www.pinterest.com/lanunemaker/

Instagram:  https://www.instagram.com/lorrie_nunemaker/

Youtube:  http://youtube.com/LorrieNunemaker

Here’s the step by step instructions: