This is another really easy, but fun project. I love to make fabric twine/rope while watching tv. I am not a person who can just sit idle, I need my hands to be doing something.
Last night, while watching a movie, my daughter in law and I made these balls of twine. They turned out so beautiful.
Today, I took her ball of twine and made it into this cool trivet. The smaller one is a coaster.
It is truly a one of a kind rope and I kinda love it! The best part? It’s made with nothing more than fabric from my scrap bin! What a wonderful way to recycle your scraps.
I plan to keep going with my ball of twine and hope to make a rug out of it. They are fully washable (I know that’s what you were thinking when I said rug!).
So, do you want to learn how to make some scrap busting fabric rope? I have a step by step tutorial. I would love it if you make some if you would tag me on my social media channels and Facebook Groups. You can find me by clicking HERE.
This is going to be a really quick post. I started the Placemat Pouch Series over a year ago and the response has been overwhelming. There are now 10 different placemat projects.
Today, I launched the newest member – Version 10 – The Tote.
I am really happy with how this one turned out and I think the faux leather opens up a bunch of possiblities with the Placemat projects. I’ve already got a few others lined up.
You keep asking for MORE placemat projects, and what can I say! They are really a really easy sew! The Pioneer Woman Placemats make all 8 versions (plus one 1 wallet) a fast and easy project that make beginner sewist, like me, look like we know what we’re doing!
This version I refer to as, the clear project pouch. It’s perfect for keeping all of your notions together for a specific project/pattern. I used a kam snap kit to close this one.
You can also use a zipper. I thought this one would be perfect to hang off the back of the car seat for the grandkids to keep there road trip entertainment in. You can pack quite a bit into one of these little ditties!
If you’d like to give version 8 a try, I’ve got a step by step tutorial for you! Want to see all 9 placemat projects? Watch the playlist here.
The Placemat Projects have sort of “been my thing”. It’s funny, really, I never intended to create a whole series of pouches based off of these Pioneer Woman Placemats from Walmart.
I made another bag (not a placemat bag and someone asked me if it was made from a placemat. I immediately knew that I could make something similar from a placemat, so I did.
Enter, the Project Bag. This is so easy to make and it’s absolutely the perfect size to carry your knitting, cross stitch, etc.. It has a wide open mouth to it that stays open, so you can work right out of the bag. When you’re all finished, cinch it up and you’re project is safe and sound until the next time you’re ready to work.
The six large outside pockets are the perfect place for keys, wallet, phone, etc.
So.. you want to know how to make version #6? Here’s a step by step tutorial:
Happy Saturday! I wanted to share another idea using my latest pouch tutorial (Version 4). I created this camping bag. I thought it would be really fun to stuff with things like a flashlight, bug spray, sunscreen, wet wipes, etc.. I have a lot of friends who enjoy camping and this will make a perfect gift. They can hang it right in their campsite so everyone has all of the necessities right at their fingertips! Cute, right?!!
I have a really easy project for you. Due to the overwhelming response I’ve had to the
Placemat pouch tutorials, I thought you might enjoy a DIY placemat, so that you can use your own beautiful fabrics.
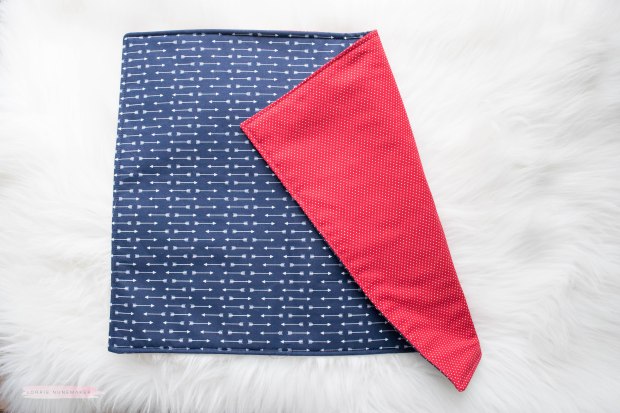
This is a really easy, basic placemat. I will show you how to add your own “cheater binding” so that you can add the pop of color around the zipper (red polka dot in the photo above).
I do recommend one change from the video. This placemat is not quilted due to the way it is made. Therefore, I would highly recommend adding Heat N Bond Craft Interfacing to the lining. In the tutorial I show you how to add the fusible fleece to the outer fabric. I recommend using both the fusible fleece on the outer and the interfacing on the lining. This will provide a stiffer, crisper pouch.
I also linked a video to bind the placemat around all four sides in case you really want to use this as a binded placemat. You can absolutely leave it with no binding as well. A lot of different options for a lot of different looks.
Disclaimer: Links above are affiliate links. By clicking on these links I may make some change at no cost to you. Some products may have been provided to me by vendors, however, all opinions and reviews are strictly my own.
Instagram: https://www.instagram.com/lorrie_nunemaker/
Measurements:
(2) pieces of fabric 15 x 20″ (My fabrics are from Joanns)
(1) piece of fusible fleece 14 x 19″ – Linked above
(1) piece of interfacing 14 x 19 (OPTIONAL) – Linked above
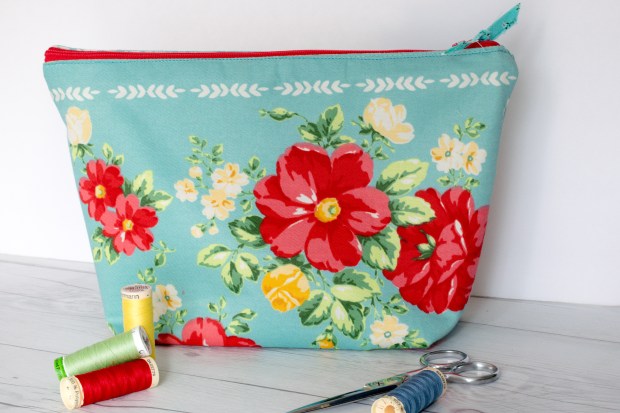
Hello and welcome! Today I have ANOTHER placemat project for you. These placemat projects have had an enormous following and I could not be happier about it. They are so quick and easy to put together and the hard part (the quilting) is already done for you!
Today, we are making this upright version. This could be perfect for a make up bag, a lunch bag, an “essentials” travel bag or even just a cute tote or pouch for storage.
The boxy shape and raised zipper make it extra roomy and easy to get in.
I lined this one with Thermoweb Iron On Vinyl which gives the inside a wipeable, waterproof lining. The handle uses Thermoweb Extra Firm Fusible Interfacing to give it extra sturdiness and durability. IMPORTANT NOTE: handle interfacing should be cut to 2″ x 14″, not 4″ x 14″ as stated in video. All of the correct measurements are in the video description.
We are making card wallets today and the best part about it is – We are making them from a placemat! These are oh so easy and the perfect project for the beginner sewists, like me!
I recently went to Creativation in Phoenix and needed something to carry my business cards to the show. I bought a boring little magnetic metal pouch to take to the show, but I was thinking this morning that there must be a cuter alternative.
Which led me to my craftroom and my Pioneer Woman placemats. I whipped up a couple of these in less than 30 minutes. The only supplies you need are a placemat, ruler, magnetic closure, a piece of coordinating fabric and your sewing machine.
Ready to make one? You guessed it! I’ve got a video tutorial for you. Please tag me on social media if you make one!
Please note affiliate links may be used above. Clicking these links help support this channel at no cost to you.